¶ Arma 3 Installation
In this guide we will go over how to setup an Arma 3 server on a node. We begin by opening the ports.
¶ Opening ports
Firstly we need to open the ports on the node. Which are:
2302 - Arma 3
2303 - Steam Query
2304 - Steam Port
2306 - Battleye port
By not enabling the Batteleye port, you will not be able to play on the server through Arma 3 with Battleye enabled.
If creating a second server, add 100 when opening ports for it.
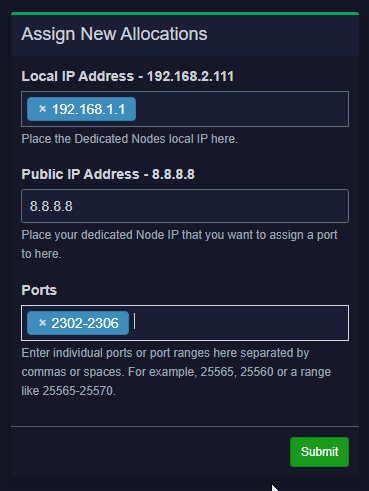
- Head to "Dedicated Nodes" under "Management" on the left navigation panel.
- Select your node
- Along the top, select "Allocation (Port Forwarding)"
Enter your node's local IP, public IP, and port range.
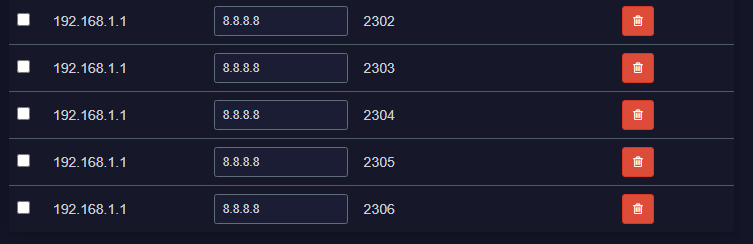
Now you will have the following ports opened on your node:
¶ Setting up the server
Next head to "Servers List" and press "Create New"
Here you can start filling out your server information, this is how it will be displayed to you and not in-game.
Make sure that the "Default Port" is the same as the one we just opened. Use Additional Ports to assign the rest of the ports to the server.
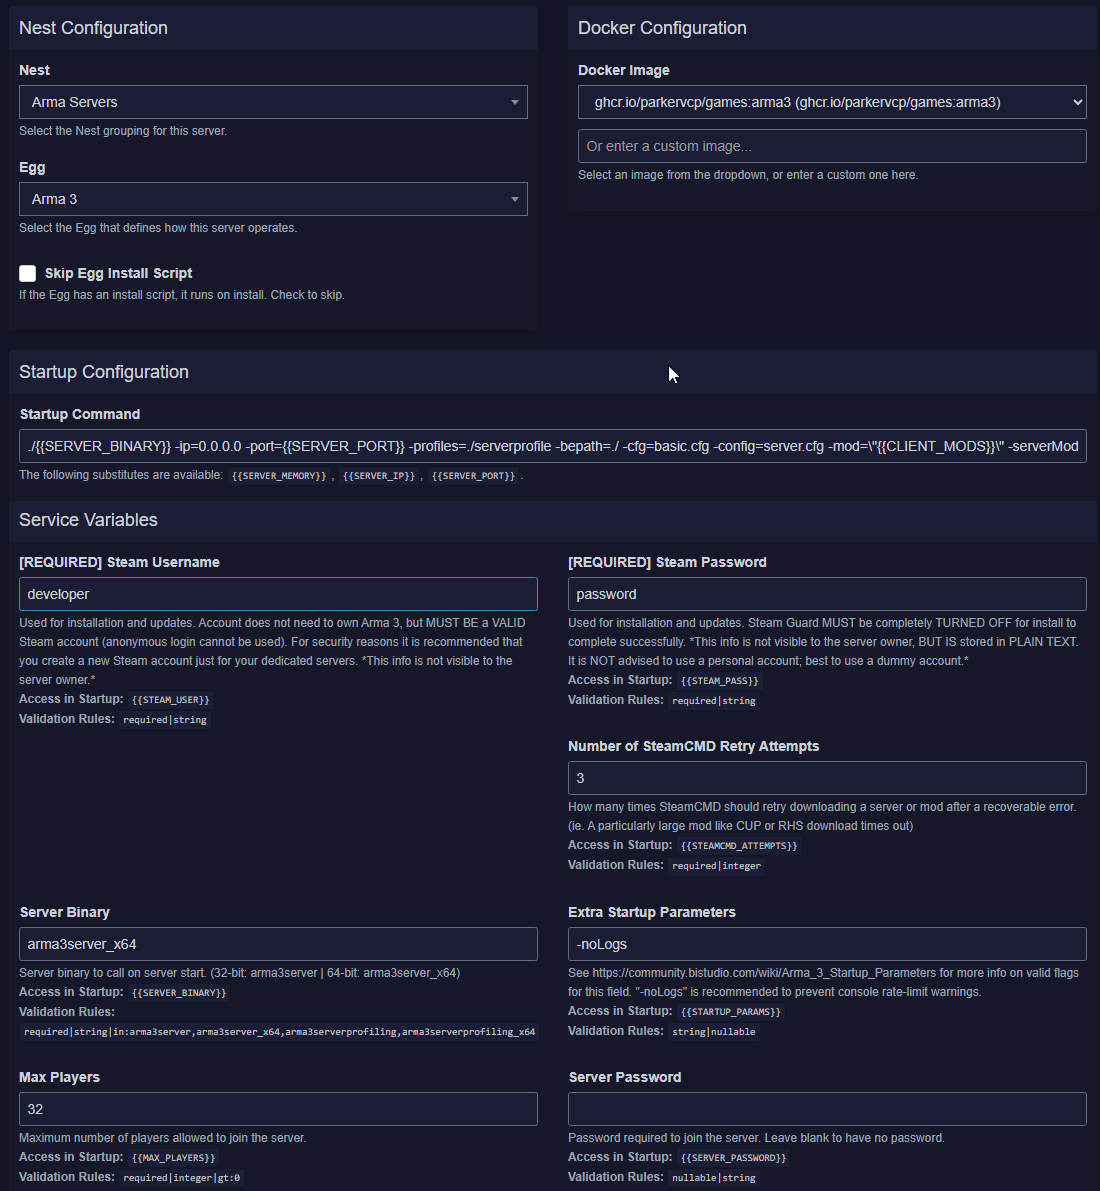
Once you've allocated the resources, scroll down to Nest Configuration and set the Nest to Arma Servers, and select Arma-3. Here you'll be able to configure everything about your server, such as the name, image, custom map, modding framework and so on.
Each section has a description so fill out as you see fit. Leave empty if something is not needed/wanted.
Click create server when everything is ready.
Now you can head to the panel, and you can see your server's console as it's being setup.
Do not stop the server during this, as it will need to be deleted and reinstalled.
¶ Deleting the server
To delete your server, go to:
- Servers List > Arma Server
At the top, click on delete.
Safely Delete This Server.
Forcing the deletion of the server results in the panel files being uninstalled, not the files of the server itself, so only click it if deleting the server safely is not possible.